|
|
Post by coopdad on May 26, 2009 13:45:41 GMT -8
Hey, I'll trade ya some lights that might just work , for a copy of the body when it's done :-) Not a chance, I don't wish this much work on anyone. It is funny that I have been hearing (reading) a lot of grumbling lately about old kits having flash that the builder has to clean up. That would be nice on this build...a little flash. I have made a little work on the truck that I can show. I have been spending literally hours doing math; measuring a part on a photo then converting it to 1:24 scale. Since I have so few photos I have to guess a few sizes. Then I will spot that same part in another photo and have to change my blueprint and all the measurements I made based on the assumption. So, I made the first draft of the rear area.  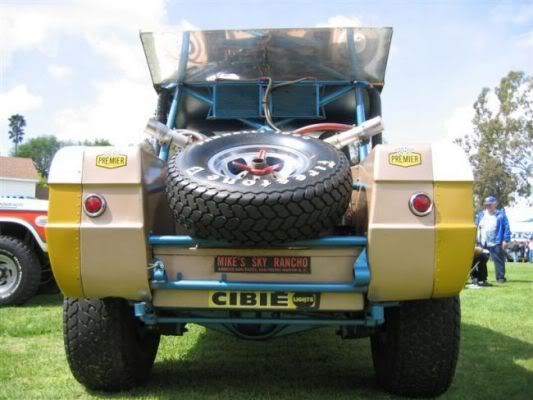 This section is very important to the build as it holds the body in the basic shape that all the other stuff underneath will be attached. If this section is off, then areas like the fenders will not be across from each other and the axle will have to be angled. Could be hide in the front by angling the tires but in the rear it will be obvious. So, lots of test-fitting holding all the panels together using casting clay (if anyone has a better option, let me know. Hot glue melts the styrene, I know.). 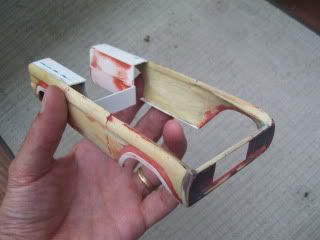 I am glad I chose this step when I did. I found that when I test-fit the grille, the body panels had twisted.  A lot of heating has helped some. Some more sanding and filling will get it right (or close enough). Next will be staring that crazy tubes under the body. As always, any question? Please ask. John |
|
|
|
Post by bigjeepzz on May 26, 2009 16:14:59 GMT -8
Dude you are doing an fantastic job. Amazing work man! This is going to be one hell off a model when done. You are going to get alot of praises on this from the entire modeling community for sure.
Jake
|
|
|
|
Post by DesertDog on May 27, 2009 16:43:43 GMT -8
LOL....
Yours still looked better than the warped toy I bought to to attempt the project with.....
LMK when you get to the light stage.....
I'll see what I can do for you anyway.
PS. I did mean just the body side panels,
BEFORE you started in on the "Bulkheads" ;D
|
|
|
|
Post by coopdad on Jun 12, 2009 8:23:51 GMT -8
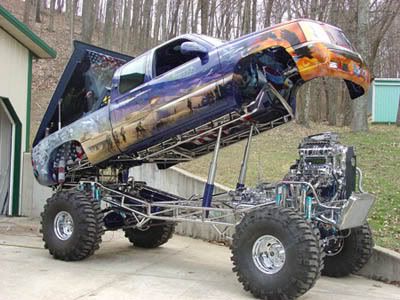
I did mean just the body side panels, BEFORE you started in on the "Bulkheads" ;D I still can cast them but not sure if I will, this is taking so much time that I am danger of loosing interest because of the complexity. Anyway, have done some more, mostly building the basic cage in the interior. Everything seems to hang of it so start there.   then add the grille support and guess where the axles will go:  The guess to where the axles will go is critical as the next set of bars cross right above them, hold the mounts for springs and shocks. Again, it that is off the whole from will be off. The bumper support on:  To add to the complexity of this project, I am having to think very far ahead about how to assemble the truck later. For instance, it I had put in the bars across the top of the doors, I wouldn't have been able to squeeze the interior in... the real truck had a lot more room to work than one 1:24 the size. And the more I research I am finding that during the four years it raced they made major changes both obvious and hidden. So I am going to pick a specific race (its 2nd Baja 1000 win) and build it to those specs. Most obvious was the grille and bumper:  In the top photo the first/prototype grille was just a factory grille with a few playful changes like the PJ (Parnelli Jones) in the center. Then they decided they really needed more lighting so they added headlights where the blinkers were (photo 2). Then we guess that a metal grille was becoming a pain to fix so they replaced it with a fiberglass one (photo 3). There is some evidence that Parnelli was constantly wanting to cut down the weight so that too probably played a factor. The factory bumper was also changed to something that was better able to protect the radiator....note how far from the body it comes out. Then after a major crash, the made the bumper a lot closer to the body (photo 4). Hope ya'll enjoy the process. I am learning TONS about this truck as a fellow Bronco-nut friend and I have really been delving into the history trying to answer the whens and whys of this famous racer. What we learn will more than likely end up in an article for the magazine... humm, I wonder if I can write off the building of this model? John |
|
|
|
Post by Big Ed on Jun 12, 2009 10:43:49 GMT -8
Hey John. I've never built, or even considered building a racer (like the site name implies), I think because they look way too intimidating when it comes to the detail that has to be put into the model. A lot of the truck is open. But this build has peaked my interest like the other racers that have been built here. Plus, I love these early Broncos. You're doin' a killer job bud.
|
|
|
|
Post by coopdad on Jun 15, 2009 12:21:43 GMT -8
Thanks Larry, we will see how it turns out.
And yes, the racers seem to be very difficult to build. I found that out on the first Bronco I built... there is just no place to hide stuff like wiring or brake lines.
But on the other hand, if you are not building a model based on a real 1:1 vehicle, the parts on different racers are not too different. I mean, other than electronics, the principles are the same... they all need a cage and cage design has not really different among racers or changed over time if you happen to be building an older racer (at least that is what I am observing).
John
|
|
|
|
Post by coopdad on Jul 3, 2009 11:38:20 GMT -8
Making some VERY SLOW progress on the truck, mostly the cage. So, to date the cage is about 1/2 done... many more tubes around the engine and need to start the cage behind passenger compartment. 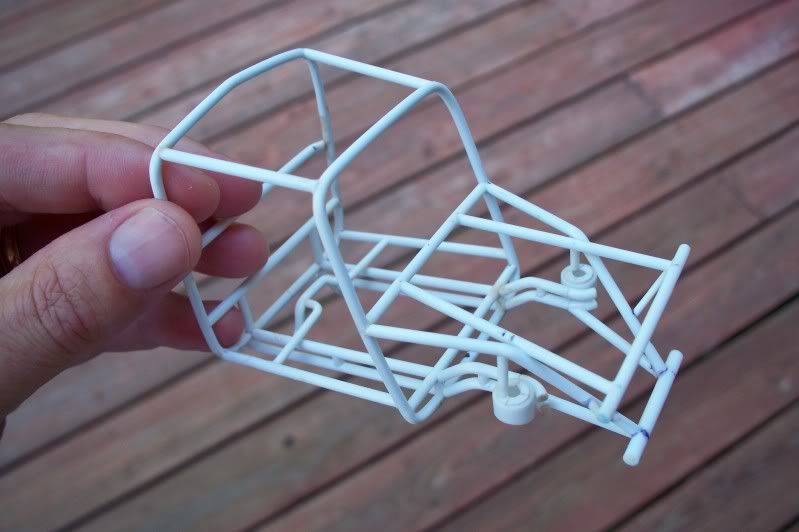 The spring buckets are a little larger than in the initial build photo (above) because the year of Oly I am building, the buckets were made larger. Mine (hopefully) match that version. Have also moved the front fenders up. In the above photos you will notice how much too low mine were. They are now much higher. John |
|
|
|
Post by scalemodelrestoration on Jul 12, 2009 4:34:24 GMT -8
WOW JOHN!
YIKES! thats alot of work! BUT lookin awesome! keep at it!!!!!!!!
|
|
|
|
Post by wtsf150 on Jul 12, 2009 14:00:32 GMT -8
John this is going to be awesome great work but then again i wouldnt expect anything less from your work again awesome work
Willie
|
|
|
|
Post by coopdad on Jul 20, 2009 6:43:10 GMT -8
A little more SLOW progress... Most of the front suspension close to done... still need do is the steering and of course the hubs/brakes. Still looking for springs. They are very large, much larger than ball point pen springs. 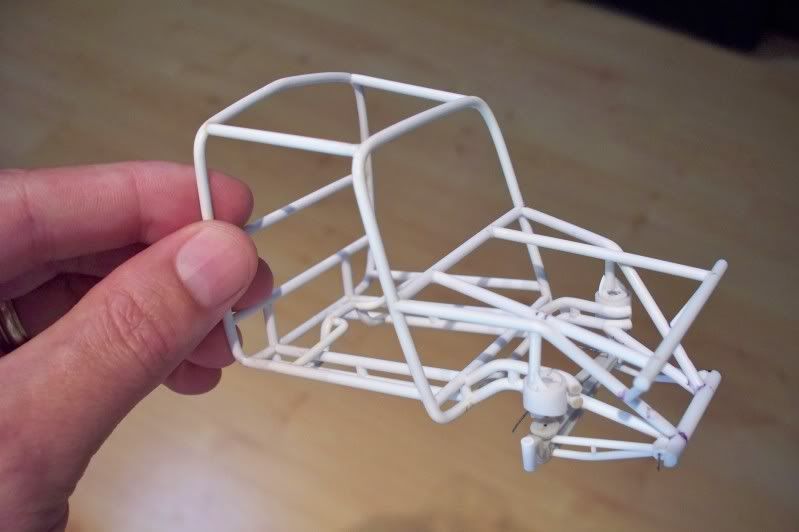 While searching for the springs, hubs, steering parts I am working on the edges of the thingypit. When that area done I will know where the rear suspension will be. 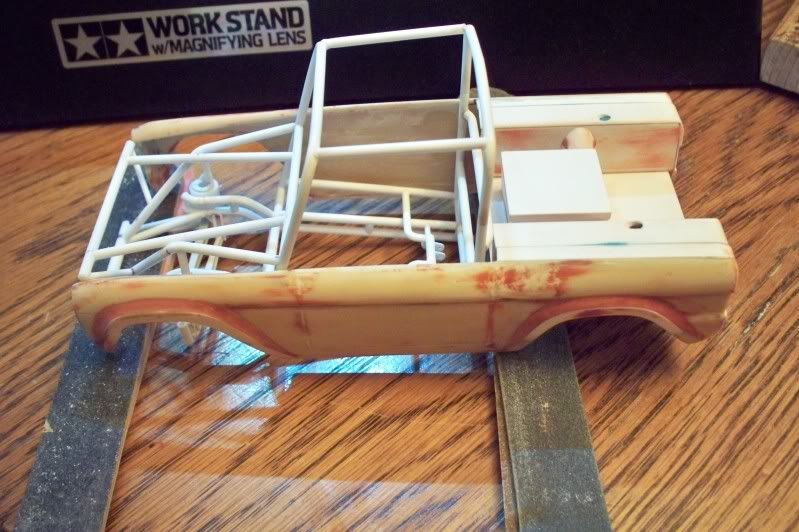 John |
|
|
|
Post by Big Ed on Jul 20, 2009 14:50:50 GMT -8
Hey John. Incredible work. And I love the Bronco body.
|
|
|
|
Post by wtsf150 on Jul 20, 2009 15:31:01 GMT -8
Joh great work on the frame let me know what dia. spring you need i might be able to help ya out
Willie
|
|
|
|
Post by modeljeeper on Jul 20, 2009 21:21:57 GMT -8
I really love seeing your dedication to the Big Oly and piece of history, both the 1:1 vehicle and your model!
|
|
|
|
Post by coopdad on Jul 28, 2009 6:32:10 GMT -8
Thanks guys for the kind words. Made some more progress on the cage:  Now I will be adding the rear half of the cage. John |
|
|
|
Post by coopdad on Aug 1, 2009 6:08:43 GMT -8
Another update... Rear suspension is now on. Right now it is just held in place with little bits of wire... not sure yet if I will keep it fully functional or glue it in place. The cage above it will be next (as I gather engine and brake parts). 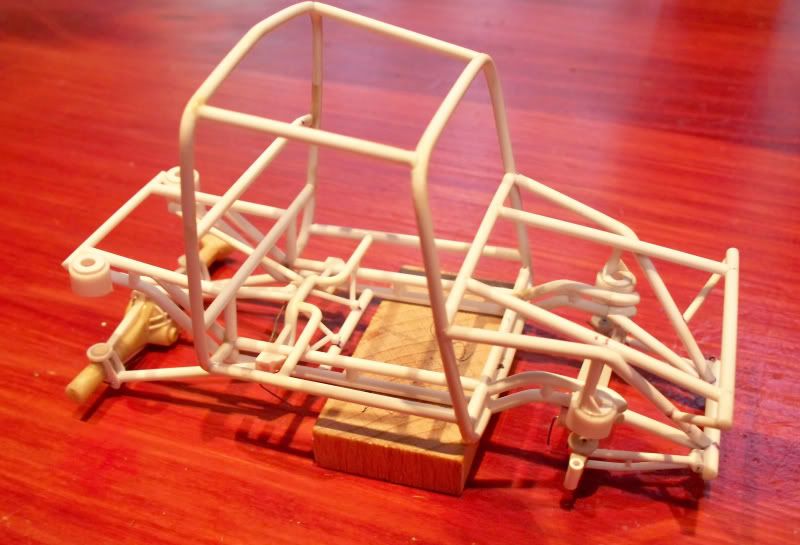 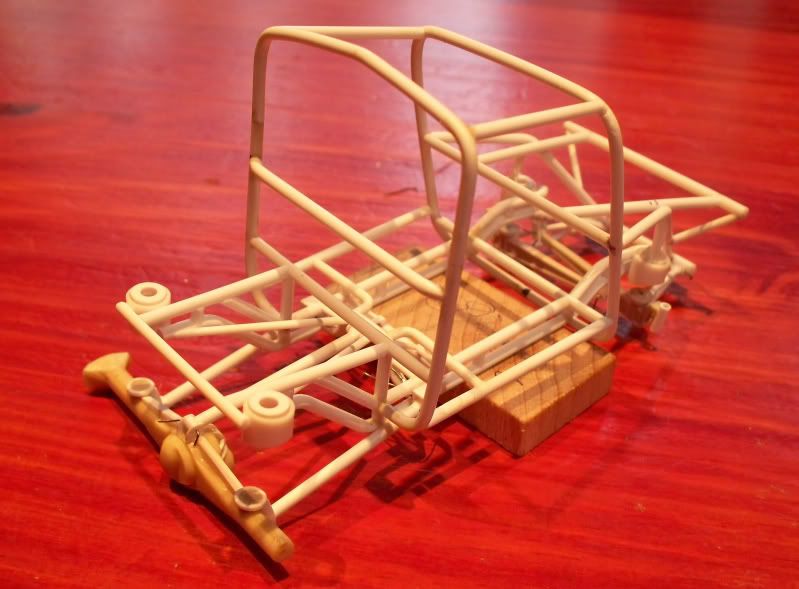 Thanks for watching. John |
|