|
|
Post by Big Ed on Jul 17, 2009 17:04:16 GMT -8
 Hey all. This is one of the wheels for the Scout trail truck. I scratched the locking hubs and did a tutorial in the Scout album. 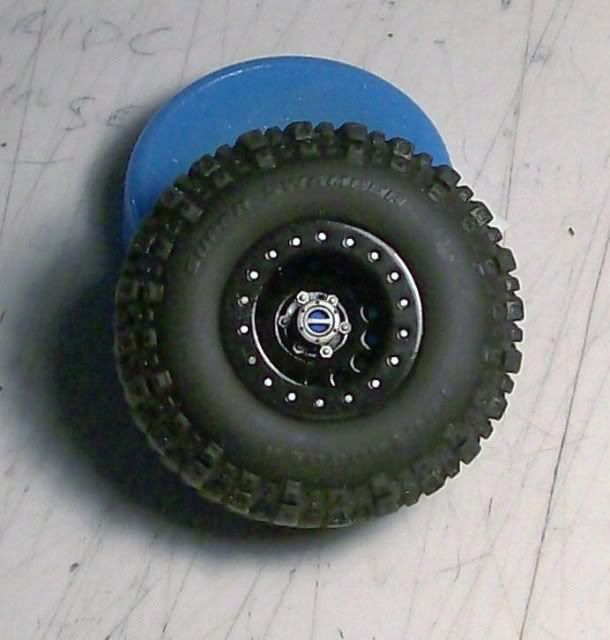 P.S. That light spot on the right side of the lockring is a light reflection. It looks like I didn't center the ring, but I did. Thanks for lookin'.
|
|
|
|
Post by bigjeepzz on Jul 17, 2009 18:26:39 GMT -8
WOW! Dude that is freaking incredible. I have got to check out the tutorial on this!!!!!!
Jake
|
|
abe dooley
5-1600
 NEED PICS FOR NEXT BUILD.
Posts: 63
|
Post by abe dooley on Jul 17, 2009 22:25:15 GMT -8
I couldn't believe how easy this was to do!!! Larry is the man when it comes to simplifiying something that a normal human can't wrap our head around..... I mean, have you looked at his shock tutorial?  !!!!!! I will post the pics of the hubs I made following his tutorial tomorrow when the ol' lady lets me have the laptop back. I'm using my PSP right now. |
|
|
|
Post by coopdad on Jul 18, 2009 3:56:00 GMT -8
Ditto, cannot believe how simple it was to build. Thanks so much for actually posting the sizes of the parts used.
John
|
|
|
|
Post by Big Ed on Jul 19, 2009 17:17:21 GMT -8
Truly, it was my pleasure fellas. And thank you.
|
|
|
|
Post by wtsf150 on Jul 19, 2009 19:20:15 GMT -8
WOW!!!! Larry they look breat havent looked at the how to yet your detail work is amazing
Willie
|
|
|
|
Post by Big Ed on Jul 19, 2009 19:26:38 GMT -8
Thanks Willie.
|
|
|
|
Post by modeljeeper on Jul 21, 2009 13:28:07 GMT -8
Those are great looking hubs. Being able to see items broken down into smaller/sub-assemblies really helps when scratchbuilding. I never thought about doing that with hubs before.
Richard O.
|
|
abe dooley
5-1600
NEED PICS FOR NEXT BUILD.
Posts: 63
|
Post by abe dooley on Jul 23, 2009 11:05:03 GMT -8
Heres my hubs. Just need to add them to the rims along with nut and bolt details. 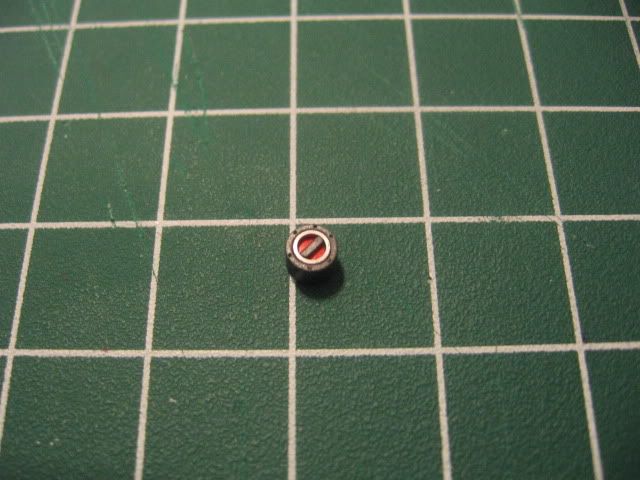  THANKS LARRY FOR ALL OF YOUR AWESOMENESS!!!! |
|
abe dooley
5-1600
NEED PICS FOR NEXT BUILD.
Posts: 63
|
Post by abe dooley on Jul 23, 2009 11:07:15 GMT -8
Now I just need to figure out how I'm gonna fill the holes in on the rim itself........uuuuhhhhgggg......... If it aint one problem, its another.
|
|
|
|
Post by Big Ed on Jul 23, 2009 15:54:42 GMT -8
Hey Abe. That hub looks awesome. Killer job bud. Here's a link to Grandt - I used part # 127 - the .031 nut/bolt end for the lockring bolts. I cut off the bolt end leaving just the nut. grandtline.com/model_railroad/augmentables_pages.htmTichy's small nuts are square...Grandt's are hex-head. They look good to me so that's what I went with. They're inexpensive too. Abe, I'm glad I can help. I love what I do, even though it's just a hobby. |
|
|
|
Post by bigjeepzz on Jul 23, 2009 17:31:44 GMT -8
Nice hub Abe. Very cool trick Larry, you are the man.
jake
|
|
abe dooley
5-1600
NEED PICS FOR NEXT BUILD.
Posts: 63
|
Post by abe dooley on Jul 23, 2009 18:36:37 GMT -8
Larry, did you round off the top of your hubs? Yours looks more round. How tall did you make yours? I have another round disk that will go under the hub and THAT will have the bolt heads in it. What do have under your hubs? It looks like it has a lip.
|
|
abe dooley
5-1600
NEED PICS FOR NEXT BUILD.
Posts: 63
|
Post by abe dooley on Jul 23, 2009 19:18:30 GMT -8
I just had a cool thought...... or a brain fart...... I wanna see who can build the best looking set of hubs. I mean, its very simple, quick, and it doesn't take too many materials. Maybe instead of the buildoffs, maybe we could do a buildoff on a single part. We'd have to agree to do the same part, but we could each put our own spin on it. It'd also be alot quicker than doing a complete model. Am I making any sense or am I having a "BRAIN FART" |
|
|
|
Post by Big Ed on Jul 24, 2009 19:19:18 GMT -8
Jake...Richard...thank you for the compliments. All the accolades mean a lot coming from the guys who actually inspire me to do this scratchbuildin' thing. Again, I love what I do.
Abe, yes I did round off the outer edge of the hub assembly. I just inserted the hub until it looked good to me, and glued it. I cut out the center of the wheel and smoothed everything. Then I cut a disc from .030 Evergreen sheet. I found center and cut a hole in that for the hub to fit snugly...snug is always good. Then I tried to get the 6 lug holes evenly spaced. I drilled 2 across from each other which made it easier to drill the remaining 4 lug holes "pretty close". I glue the wheel center to the back of the wheel, painted it, then the nut/bolt stems were glue along with the locking hub.
|
|

 Hey all. This is one of the wheels for the Scout trail truck. I scratched the locking hubs and did a tutorial in the Scout album.
 !!!!!! I will post the pics of the hubs I made following his tutorial tomorrow when the ol' lady lets me have the laptop back. I'm using my PSP right now.